Saturday 14 April 2018

Scaler - Plugin Boutique


An incrediblely intuitive tool for not only learning scales and chords but how they work together. Beautifully designed and essential for anyone who is not versed in musical theory. The drag and drop feature which places the midi notes inside your DAW is fantastic as is the dragging of chord tiles from your selected scale into the arranger. One of a kind and probably the best and easiest out there, especially when compared to the likes of 'Instachord'.

Scaler is a unique and inspirational MIDI effect that makes finding chords and progressions intuitive and fun! With note detection, scale selection and chord suggestions, Scaler is a comprehensive but easy-to-use toolbox that will help anyone make better music.

A first of its kind, Scaler can determine what key and scale you’re in and suggest chords that match your music, or it can inspire a tune from scratch by providing a set of initial chords in an unexplored key. With the onboard bank of 1,728 scales and modes including genre and artist presets, there’s more than enough to keep the juices flowing.

Once you’ve determined a scale, Scaler lays out basic diatonic chords for you to audition, and lets you take things further with dozens of chord variations and voicings to try out. Theory buffs can also get an insight into each chord’s harmonic function.

Ready to put together a progression? Simply drag and drop chords into Scaler’s sequencer, change up octaves and inversions, and record or drag the progression into your DAW.

Benefits

•Discover your music’s key and explore alternative scales and chord sets
•Choose from hundreds of keys, and get the harmonic flavours of pro artists
•Easily audition chords and find alternative voicings and common substitutions
•Quickly build intelligent progressions by dragging chords into Scaler’s chord sequencer
•Drag chords and progressions from anywhere in the plugin out to your DAW

Detect

•Discover your track’s current scale with MIDI keyboard or piano roll note detection
•Get an insight into the emotional content of matching scales
•12 keys across 12 scales and modes giving you a total of 144 options to choose from
•12 unique voicing types giving you a potential 1,728 Scales and modes
•Over 50 artist chord sets from the likes of Carl Cox, MJ Cole, CeCe Rogers and Mike Huckaby
•Over 50 genre and mood-based chord sets such as Chill, Drum & Bass, Jazz, Soundtrack, EDM…
•Check how closely a given scale matches your detected input

Keyboard

•Keep an eye on notes and chords going through Scaler with real-time visual feedback
•Visualise the chosen scale as highlighted notes on Scaler’s piano keyboard
•Audition chords from your chosen scale with a choice of four sounds
•Play and record one-finger chords using Scaler’s Bind MIDI function
•Assign any VST / AU instrument to Scaler to control your favourite synths

Explore

•See the basic diatonic chords that can be built from your chosen scale
•Browse Chord Variations for each note to get suspended chords, extended chords, dominant sevenths and jazz chords
•Quickly get a sense of each chord’s harmonic function in progressions
•Discover chord substitutions that lend variety to your progressions
•Experiment with different chord voicings to spread notes across the keyboard
•Mix and match from hundreds of artist and genre-based chord sets

Build

•Drag and drop chords from your palette into Scaler’s Progression Builder
•Transpose and invert chords for even more voicing styles
•Audition your progressions and make changes with drag-and-drop
•Save your own chord sets to the preset bank for later use
•Export MIDI to your DAW simply by dragging and dropping

New Features in Version 1.2

•Humanise Velocities: the velocity of each note within chords is randomised to provide a more natural playing style.
•MIDI Export Length: select length of MIDI notes for export and drag and drop.
•Improved Progression Builder: Now handles up to 16 chords & chord progression is now played at DAW tempo.
•21 New ChordSets: Classical (8), K-Pop / J-Pop (6), Neo Soul (6)
•11 New Scales: Lydian augmented scale, Acoustic scale, Major locrian scale, Ukrainian dorian scale, Hungarian gipsy scale, Melodic minor scale (asc), Half-diminished scale, Phrygian dominant scale, Persian scale, Neapolitan major scale, Neapolitan minor scale

Tuesday 27 March 2018

Heavier7Strings - Three Body Tech

I have not auditioned every guitar emulator out there but  as far as i have heard this one comes as close to perfection as one could get. Extremely realistic sounding guitars that, only an experienced guitarist might be able to tell the difference.Not only are the heavy metal guitars spot on though, the clean ones are also surprisingly excellent too. A great preset library is included ( note: seperate download required of almost 6GB!) which includes everything from epic riffs - rock - ambient clean. Its all very well featured with effects racks all built in and drag and drop MIDI patterns inside your DAW. An essential piece of kit to have whether your an experienced guitar player or not!
Heavier7Strings is a metal guitar emulation virtual instrument based on a guitar sample library, made by Three Body Tech developers from China. As soon as I heard a demo, I knew that I’d like to try it. Having been a guitar player for almost 30 years, it is not so easy to fool me with some “wanna-be” guitar sounds, but this one sounds quite real, not to mention the fact that it comes with over 200 MIDI clips that can be loaded into your sequencer for further manipulation. After installing this 9 GB beast I spent some time glancing through the quite-detailed manual, along with browsing for some video tutorials, as it proves not to be a “first try – first success” sort of plug-in, or to put it simply, I was not able to get immediate results. Of course, when I finally figured out how everything worked, everything seemed so logical, easy and well-placed.
Finally, after all the tutorials and manuals, I was on the road to making my own riffs. If you listen to Heavier7Strings in isolation, you may notice some tiny moments that can give you a clue that this is not a real guitar played by a guitarist, but, at least in my opinion, they are so small that only a skilled guitar player can hear the difference. This is definitely not the case with any other guitar library/instrument that I’ve tried before. Most of them sound quite solid in a full arrangement, but sounds obviously fake in isolation, mainly because the attack was too prominent causing the whole thing to sound more like a harpsichord and not like a guitar at all. Next thing with all other guitar emulations is the issue with the transitions between riffs, or even between some notes in solo phrases, that sounded a bit off, unnatural. Those are only two of the main reasons, but truth be told there are also all sorts of other, maybe not so prominent, smaller guitar misbehaviors comes with all other guitar emulation software, that can be spotted even by non-guitar players. So, thumbs up, my dear China friends. This one comes quite close even in isolation.
As soon as you put virtual drums and virtual bass alongside Heavier7Strings, everything becomes absolutely real and wild. You need to be a really, really picky guitar expert to notice the difference (and trust me, it is better to have good fake guitar than a bad live guitar player). Riffs and even lead lines sound very authentic. Of course, my dear keyboard playing friends, it would not hurt if you know at least the basics about how harmonies are played on guitar, or at least know how to recreate a few basic heavy guitar riffs. Even if you are somewhat barefoot in this field, there are those aforementioned 200 preprogrammed MIDI patterns that should serve as a good starting point.

    My first attempt with Heavier7Strings.


Menu

Let’s go through some details. Top left is the main menu, with five buttons. First two are reserved for load or save options where you can store specific settings for the whole instrument. Last button is reserved for Settings, where I have set Zoom to 125% as the main window was a bit small for my taste. Of course, this is not the only thing that you can set there.
The most interesting parts of the menu, at least for me, are Patterns and Effects buttons, opening new windows with this two parts. For a better understanding, we should explain that the main structure or base for the whole instrument is clean sounding electric guitar samples that are processed later through a quite impressive and detailed effects rack. So, in the effects section you can drag various effects into the rack directly from the left side menu. Also, you can simply load some ready made effects rack combinations from the right menu with the browser, where you can select one of many effects combinations, choosing between Ambients, Clean, Epic Riffs, Metal Riffs, Overdriven, Rock Riffs, Solo or Strumming group. There is also a set of options here to save, delete, create a new group or separate presets within a group.
The next one is the Pattern window, offering quite similar groups as can be found in the Effects section, offering three additional groups along with all the aforementioned ones. These are Demo Songs, Noises and Ultra Low. Every group comes with quite a nice number of patterns, offering a star rating system for every pattern. You can also preview a pattern being perfectly in sync with your host. All patterns come with predefined settings for the Effects section, along with settings that are preselected for that pattern in the main window. The one you like can easily be dragged into the arrangement window. Of course, there is a problem that every new added pattern changes the whole settings, so it would be nice to have some option to drag a MIDI clip only once when you first load MIDI in your arrangement, preventing that all further clips will change your settings. The good thing is that you can make your own Groups and add new patterns simply by dragging your MIDI clips inside the Pattern main window, having them for further usage in some other projects. This works in Cubase, but at the moment unfortunately doesn’t work inside Studio One. Hope this would be fixed in a future update.

Main Window

All controllers are set around a big black guitar picture. In the upper part we find level sliders for all six strings along with modulation and sustain buttons. Of course there are still a zillion other controllers, so you can totally go into detail regarding your sound, but I will only go through those that change the sound quite generally. So, at the bottom you can find a nice number of buttons for various functions. One Key Fifth button, for adding a fifth interval to the note you currently playing. Play Octaves adds an octave to a lower key when you press two notes. Simple Chord makes a proper guitar chord out of your three notes. All these changes are visible on a guitar neck as small dots with names of all played and added notes visible on a guitar neck. There is also Legato Mode, Unison Bend and Auto Slide buttons for exactly those things they are named for. As mentioned before, a few other are also there, but for me the most sweet and useful one is Vel Muting, which plays palm mute notes on lower velocities and open, normal notes on higher velocities. The whole system is set that at the highest velocities we get pitch harmonics that are very specific for any metal music. Hammer-on/Pull-Off is triggered on velocities under 28.
There are a few ways to control your playing. One is with velocity. Also, almost everything is controllable through CC controllers. The modulation wheel switches between palm mute and normal legato notes. There is also a nice number of key-switches for all sorts of functions – again my favorite is the Repeat function where some keys repeat muted notes that you hold higher on the keyboard range, while other Repeat keys repeat open notes. It allows you to go wild, changing chords with the right hand and banging rhythms with right hand just by changing between Mute-Repeat and Open-Repeat keys. In the upper keyboard range we also find an octave with harmonic control. It is very nice addition, being able to reach some functions and articulations in different ways, leaving the final choice to the user, not being so determined by the developer’s choice. Specifically regarding those palm mutes: open note combinations are on some occasions not so easy to control just by velocity, and it is far easier to achieve this through the mod wheel or simply by drawing some controllers in the CC controller editor.

Conclusions

Once I had gotten a grip on it, Heavier7Strings has been one of the most joyful instruments that I’ve used lately. It is not just a tool for creating angry metal riffs, but also for playing mad metal solo lines, sounding absolutely realistic with all the elements that you hear in most metal songs. I didn’t elaborate on this part, but according to some third party demo clips, with some keyboard playing skills and a few CC/key-switch changes, it can be done perfectly. Playing chords and melodies with clean sounds is also quite enjoyable and surprisingly realistic. Some clean presets sound a bit 80’s, but otherwise very impressive.
It’s one of the best heavy guitar recreations that I’ve heard and tried in the last decade – and I’ve heard and tried quite a few of them. Even if you are a guitar player, sometimes it is quite a bit easier to use such an instrument. And if you are not, and you are looking for such an addition to your sound arsenal, then this is a must.
More info and some additional video and audio clips at:


Thursday 15 March 2018

The Legend - Synapse Audio


Really excellent mini moog emulator which ranks among the best such as Monark. Perfect for basslines and there's also some great string/lead sounds too!

Developed in cooperation with vintage synth specialist Bigtone Studios, The Legend is designed to faithfully emulate one of the most famous vintage analog synths. Moreover, numerous innovative enhancements greatly increase its versatility.

Uprecedented precision

Every component, ranging from the voltage-controlled oscillators (VCOs), voltage-controlled filter (VCF) and voltage-controlled amplifier (VCA), have been modeled to an accuracy never seen before in software. The snappy filter and amplifier envelopes have been meticulously modeled, as well as the massive bottom end - even the most marginal effects like temperature drift or effects originating from the power supply have been taken into account.

The most significant additions are the Unison and Polyphonic modes, allowing for thick stereo sounds, as well as enabling polyphonic play. Built around a vectorized core, The Legend is capable of synthesizing four voices for the cost of little more than a single voice, making it a highly efficient analog-modeling synthesizer plug-in.

The back panel of The Legend allows to switch between two revisions modeled, Early and Late. Moreover, extra options allow to fine-tune the analog simulation and account for part tolerances typically found in hardware. The key parameter ranges can be adjusted as well as tuning, drift or saturation.

Another bonus feature of The Legend is its on-board effects, comprising a high-quality delay and reverb unit. Both effects are tailored to the synthesizer, and offer just the right sound with only a few parameters each.

The Legend comes with 480 patches crafted by leading sound designers and sorted into categories like Bass, Lead, SFX, etc.

The Legend features summary

- Accurate circuit simulation
- Two Revisions modeled, Early and Late
- 8x Oversampled engine
- Vectorized core with Unison, Mono and four-voice Polyphony modes
- 480 patches included
- Available as VST, Audio Unit and Rack Extension


Tuesday 6 March 2018

NCH WavePad -Sound Editor Masters Edition


Another one of the best sound editors out there!

This audio editing software is a full featured professional audio and music editor for Windows and Mac OS X. It lets you record and edit music, voice and other audio recordings. When editing audio files you can cut, copy and paste parts of recordings then add effects like echo, amplification and noise reduction.

Audio Editor Features
Sound editing functions include cut, copy, paste, delete, insert, silence, autotrim and more
Audio effects include, amplify, normalize, equaliser, envelope, reverb, echo, reverse and many more
Integrated VST plugin support gives professionals access to thousands of additional tools and effects
Recommended Free VST Plugin Effects
Includes free sound effect and music library
Supports almost all audio and music file formats including mp3, wav, vox, gsm, wma, au, aif, flac, real audio, ogg, aac, m4a, mid, amr and many more
Batch processing allows you to apply effects and/or convert thousands of files as a single function
Tools include spectral analysis (FFT), speech synthesis (text-to-speech) and voice changer
Audio restoration features including noise reduction and click pop removal
Supports sample rates from 6 to 196kHz, stereo or mono, 8, 16, 24 or 32 bits
Includes its own CD ripper with 'ultrafast' rip mode and cddb music database lookup
Works directly with MixPad multi-track audio mixing, Zulu DJ software and Express Burn CD Recorder.
Easy to use interface will have you editing in minutes

Typical Audio Editing Applications
Software audio editing for studios and professional journalists.
Edit sound files to broadcast over the internet with the BroadWave Streaming Audio Server
Normalizing the level of audio files during mastering before burning to CD.
Editing mp3 files for your iPod, PSP or other portable device.
As a music editor (includes ringtones creator formats).
Music editing and recording to produce mp3 files.
Voice editing for multimedia productions (use with our Video Editor).
Restoration of audio files including removing excess noise such as hiss and hums.


Tuesday 27 February 2018

Axis - SoundSpot


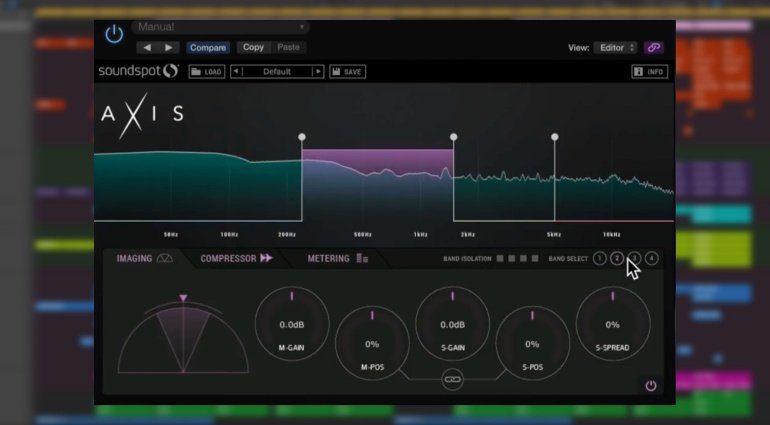
Very cool all in one multiband compresser/imager/mastering plugin. Quite easy to get to grips with and a nice user friendly interface. Great to have all of these controls rolled into one!

 When you’re mixing or mastering music, sometimes you may find yourself in a situation where you need to manipulate the audio in a way that falls outside the realms of what a conventional plugin can do, and with this in mind SoundSpot set out to create a plugin that can solve this problem. Introducing the Axis... The Axis is a combination of two of their most popular plugins, the MSW1 & Propane with the addition of a brand new upwards and downwards compressor that is capable of dual directional compression which can be both subtle and brutal. But it doesn’t end there! We’ve made the whole unit multiband, for complete control over the incoming signal, allowing you to manipulate the audio to get punch, clarity, groove or sparkle without the need to load up a huge number of individual plugins. The Axis linear phase has been made to be lightweight, so go wild... The only limit is your imagination. Features: + Intuitive, easy to navigate user interface. + Designed to work flawlessly with touch controllers such as the Raven by Slate Media. + Multiband Layout + Individual Compressor, Imager & Metering module per band + Simultaneous Upwards & Downward compression + Parallel Compression mixing + Mid Side Panning + Mono Maker + Stereo Widener + Individual Band Anti Pop Bypass + Individual Band Isolation Mode + Preset Manager with new preset scrub through feature home page


Wednesday 21 February 2018

Wavetable - Ableton Live 10 Instrument


Many wavetable synths out there such as 'Serum' etc but lives is a particularly nice one with full screen graphics and complemented by a much easier to use interface. I found myself diving deeper here than in others.No integration as yet to import your own waveforms but that is probably on the horizon.

Thursday 15 February 2018

Echo - Ableton Live 10 Device


'Echo' is such a formidibal sounding tape delay/echo device it deserves a place here all of its own,even though it's only available in 'Live'

If you’re a fan of old-school tape delays like we are, you’re definitely going to enjoy messing around with Echo. As you’ll see in our accompanying video, there are a lot of options to twiddle.

We particularly like its raging feedback; the strange metallic and tonal effects you can achieve with short delay times; and you can also use Echo as a pseudo ‘retroiser’ using its Noise section. It might not replace your favourite third-party delay plugin, but it’s definitely useful to have as a bundled device inside Live.

We leave no stone unturned in this huge walkthrough on Echo.
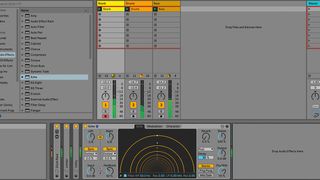
Step 1: Let’s take Ableton Live 10’s new Echo device for a spin. Live’s other onboard delay devices are rather utilitarian – except for Grain Delay, which is especially ‘out there’) – so it’s nice to see a substantial new delay to rival third-party options. Seeing as the device is a creative dub-style echo effect, we’ll load a new instance over a dry reggae ‘skank’ sound.
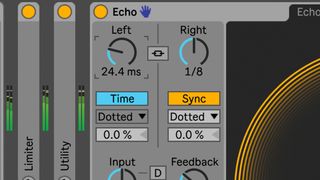
Step 2: Like any delay plugin, Echo’s Dry/Wet governs the balance of dry signal to delayed signal. We’ll keep that at around 50%. Up in Echo’s top left, you’ve got separate Left and Right controls to set delay time for the left and right channels. Sweep these around for tape-style repitching effects as the echoes spring to their new values.

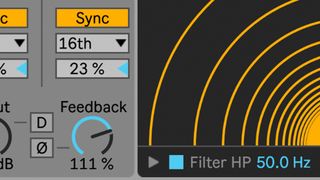
Step 3: Left and Right times are locked together by default, but you can decouple them by detoggling the yellow Link button that sits between. Both Left and Right times are synced to host tempo – detoggle one of the Sync buttons if you want to set delay time in milliseconds.
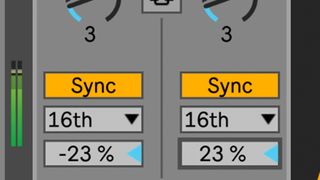
Step 4: Below the Sync buttons sit dropdown menus, where you click and choose one of four beat-synced modes. Under that, increase or decrease values in the boxes to offset either delay earlier or later by a few milliseconds. This is useful if the Left and Right delays are set to identical speeds, as you can create width. These work independently even when the delay times are locked.
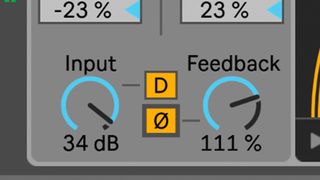
Step 5: As you’d expect, you can crank up the Feedback knob to feed the delay outputs back into the inputs for more and more repeats. After the dial is pushed past around the 12 o’clock point, the feedback starts to self-oscillate, for those wild dub-style delay effects. This is definitely a fun, tweaker’s delay!
Step 6: Next, we’ll back down the Output and crank up the Input, which will distort the delay signal. Toggling the D button causes the input gain to also distort the dry signal – set the Dry/Wet to 0% to hear this more clearly. The Polarity button inverts the feedback’s polarity, and noticeably changes the delay’s character, especially with short delay settings.
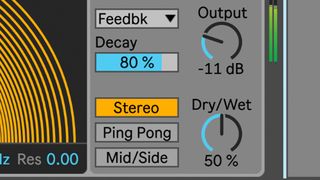
Step 7: In true Space Echo style, there’s also a simple Reverb onboard. Mix it in with the Reverb knob, and shape its length with the Decay slider. With the dropdown underneath, you can select where the reverb is placed in the signal path – Pre, Post or Feedback, with the latter getting pretty wild when settings are pushed.
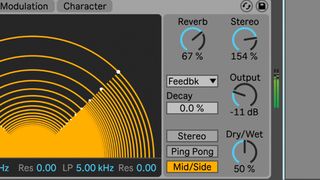
Step 8: Flanking the reverb is a Stereo knob. Setting it to 0% monos the wet signal, 100% leaves the original width, and 200% gives maximum widening. Under that are three delay modes: there’s the default Stereo mode; Ping Pong is left-to-right as expected; and there’s a Mid/Side mode – when selected, the Left time becomes Mid, and the Right becomes Side.
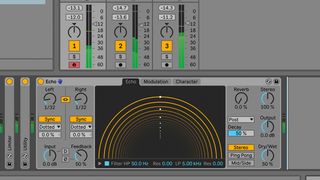
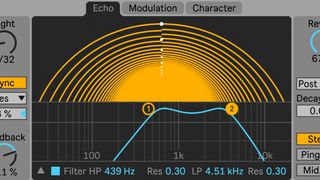
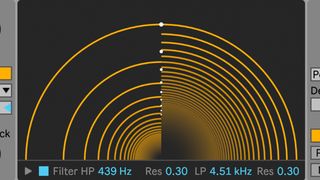
Step 9: At the bottom of Echo’s black centre section are controls for shaping the tone of the delay repeats with resonant high- and low-pass filters. HP and LP controls set the frequency of either filter, with Res boosting a peak around that frequency. Click the small arrow to pop out the filter display, where you can drag the filter nodes for more intuitive tweaking.
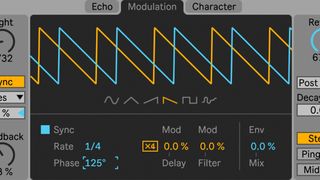
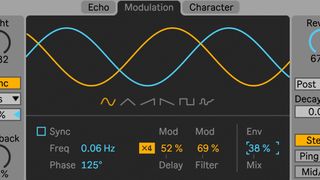
Step 10: Now to the Modulation tab, where you can modulate delay time and filter frequency with an LFO. The yellow and blue lines represent LFO shape for the left and right channels – click an icon to choose one of six LFO waves – and the relationship of these lines represents phase between L and R, altered with the Phase amount below.
Step 11: Sync switches modulation between clocked and free-running. Increase or decrease Mod > Delay to apply LFO modulation to the delay time and wobble pitch. Use Mod > Filter to modulate cutoff. Set the LFO’s Rate amount or punch the x4 toggle to scale that up by a factor of four. Push up Env to blend the LFO modulation with an envelope follower – 100% is envelope follower only.
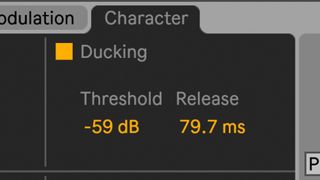
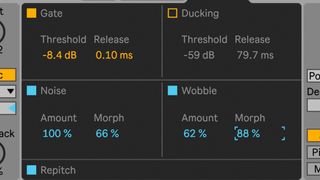
Step 12: Over in the Character section, you can alter the delay’s dynamics and flavour. Ducking does exactly as the name implies: it pulls down the wet signal when the input is triggered, a bit like sidechain compression. Pulling down the Threshold induces gain reduction, and Release sets how long it takes before the wet signal comes back up again. Time this with your song’s tempo for groovy pumping effects.
Step 13: Gate cuts any input signal below its Threshold value. Noise dials in grunge and fizz to simulate a noisy analogue delay – you can Morph between different types of noise. Wobble randomly wiggles delay time, and its Morph control sweeps between different mod types. The Repitch button at the bottom prevents the delays from changing pitch when delay times are altered.
Step 14: Just like with Wavetable, Echo’s visual feedback is particularly useful. Ableton call this centre dome-like display the Echo Tunnel: circular lines represent the repeats, the distance between lines is Time, and the density shows you Feedback.Review from Musicradar